Author: Adam
FRS-12 Solo Skiff Build Part 10
FRS-12 Solo Skiff Build Part 9
FRS-12 Solo Skiff Build Part 8
Choosing Paint & Primer
Choosing the right paint and primer for painting a boat can seem a bit complicated. So we have grouped products into categories and to make it easier to understand.. We will explain these categories and give our recommendations on selection. FYI – we provide links to products for your convenience and we DO NOT receive incentives from any of these companies.
Products for use above the waterline:
BUDGET FRIENDLY
The budget friendly paint is a 1 part polyurethane based paint, such as Interlux Brightsides, Pettit EZ-Poxy, and Total Boat WetEdge. These 1 part paints require no mixing and are ready to use right out of the can. At $20-$40 a quart then can be a very cost effective way to paint a small boat. However the downside of these budget paints is they don’t cure as hard as 2 part paints (mentioned later) and are more prone to scratching. We used Interlux Brightsides on the deck and Pettit E-Z-Poxy on hull sides for our FRS-12 demo. We have found over time that the Brightsides seems to be a little more durable and scratch resistant than the E-Z-Poxy. Both paints were super easy to apply and covered well with 2 coats. We apply these paints with white foam cabinet rollers (do not use nap rollers) and a high quality brush for hard to reach places. We recommend these for our budget priced builds, such as the FRS-12 & FRS-14.
MID GRADE
The mid grade is a 2 part polyurethane, such as Interlux Perfection. 2 part paints give you a more durable finish but require you to mix 2 parts and possibly add a thinner for rolling or spraying. You can roll or spray 2 part paints with a paint gun. We do not have any firsthand experience with these products but know many have used them with success. We recommend these paints for our mid range boats, such as the FRS-18. The mains reason is the increased durability of the paint when compared to the budget friendly 1 part paints.
TOP OF THE LINE
The top of the line paints are Alexseal and Awlgrip. While they are also 2 part polyurethane paints they are NOT on the same level as the mid graded paints (as the price will reflect). These top of the line products are categorized as “paint systems” meaning that all parts are designed to work together as part of a whole paint system within the brand, starting with their primers, putties, and paints. We recommend that you use all of the same brand products to ensure everything will work together correctly and without issue (this is a good idea for all paint products). We painted our CS-21 with all Alexseal products and have been very happy with the results. These paints and primers require mixing 2 parts plus a reducer for spraying or brushing. In the hands of a professional, a spray gun can produce AMAZING results. This is what most every custom boat builder uses. But if you are a paint amateur, a Harbor Freight spray gun for primer and the trusty white foam cabinet rollers will give you a finish that rivals most gel coats. We rolled our CS-21 and only a professional would notice it’s not spray. We recommend these paints for our cold molded boats, the Carolina and Core Sound series.
Most every paint has a matching primer offered by the same company, when possible we recommend you use their product. And since they match up with the paints not much more can be said.
A very important note about primers and paints. If you use 1 part primer, you should only use 1 part paint BUT if you use a 2 part primer you can apply a 1 part or 2 part paint over it. I have seen 2 part paint soften 1 part primer when applied and it creates quite a mess. If you use 1 part paint now and wish to repaint with 2 part later, you’ll need to remove all 1 part products before applying any 2 part products.
Products for use below the waterline:
BUDGET FRIENDLY and MID GRADE
Every primer I’m aware of, suitable for below the waterline use is a 2 part and cures by chemical reaction. 1 part primers (and paints) cure by allowing a solvent to evaporate and most often can significantly compromised by submersion. So on all boats we recommend a 2 part primer designed specifically to be used below the waterline. Three good options are Interlux Interprotect 2000e, Sea Hawk Tuff Stuff and Total Boat TotalProtect. These can be applied directly to bare glass or over another 2 part primer. We used the gray Sea Hawk Tuff Stuff on the bottom of our FRS-12 demo. It creates a very hard and durable finish with a slight texture. We decided not to coat our FRS-12 with anything else and allow the primer to act as the paint too. It resists damage from trailer bunks and even if you leave the boat in water for a few days, you may have to scrub off some buildup but the primer would not be damaged. We recommend you roll primer with a 3//16″ nap roller, 3/8″ nap will put on too much primer and foam rollers not enough.
TOP OF THE LINE
If you step up to the “top of the line” paint system we recommend you use their primer(s) that pair with their other products, many of the same general statements made in the previous paragraph still apply. If you wish to apply a bottom paint for a boat that is trailered most of the time we recommend a non-ablative or “hard” bottom paint such as Interlux VC Offshore. Non-ablative simply means it does not wear off over time like traditional (ablative ) bottom paints. If you leave the boat in the water for an extended duration and need to really combat growth a traditional ablative or “soft” bottom paint is recommended. We used Pettit Vivid (for it’s bold red color) on our CS-21 and it performs great, even with the boat staying on the trailer more than in the water it holds up great. Some bottom paints require chemicals or special cleaning/removal before re-coating. We have found that a light sanding of our Petit Vivid and a solvent wipe is all that is needed for us to apply a fresh coat yearly, which makes maintenance hassle free for DIYers like us.
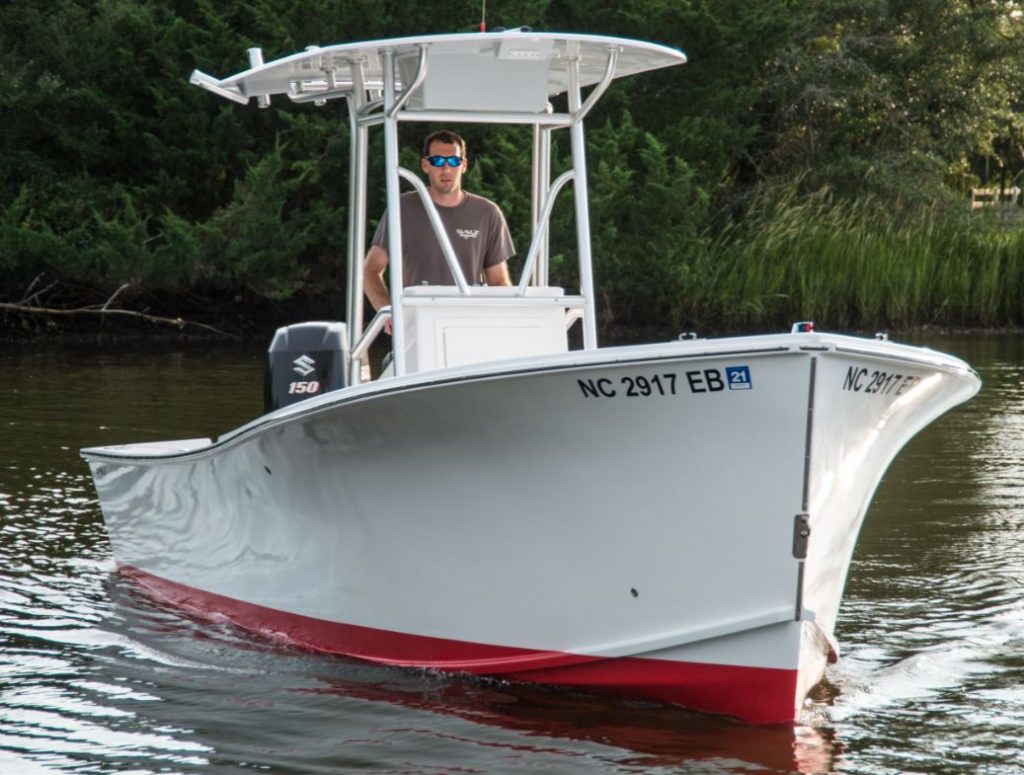
The FRS-12 with “Budget Friendly” Paints.
Bottom – Sea Hawk Tuff Stuff – Gray applied with 3/16″ nap roller.
Hull – Pettit EZ-Poxy – Seafoam Green applied with white foam cabinet rollers.
Interior – Interlux Brightsides – Matterhorn White applied with white foam cabinet rollers.

CS-21 with “Top of the Line” Paints applied with white foam cabinet rollers.
Bottom – Pettit Vivid – Red applied with 3/16″ nap roller.
Hull & Interior – Alexseal – Cloud White applied with white foam cabinet rollers.
Hopefully this article and examples of boat paint in finished application helps you understand the different products available and make an informed decision on which paints and primers to use on your boat.
Epoxy Suppliers
A few minutes of searching online and you will find there are many types of epoxy and prices vary between brand and suppliers. So what epoxy should you use? Well here are the basics, followed by a list of products and suppliers.
1) Select an epoxy designed for use in boat building, meaning it is formulated to bond with wood and laminate both wood and fiberglass. (links below) Avoid craft epoxies like “5 minute epoxy” , “casting epoxy” , “table top epoxy” , etc.
2) Select the correct cure speed. The hotter the temperature, the slower the cure speed you need. Each brand is different and will have the recommended temperature ranges for each speed available. As a rule of thumb, you want fast hardener in cold weather and slow in hot weather. There are also minimum and maximum temperatures, which the supplier will also have published.
3) Have the proper equipment. You will want pumps or metered cups for measuring out your epoxy for mixing. When working with epoxy we recommend wooden craft sticks for mixing, old plastic containers or bowls for mixing in, nitrile gloves to avoid skin contact, disposable chip brushes , rollers and notched trowels for application. A steady supply of fresh air is important and a respirator can also be a great asset. Most of these items can be purchased from those selling epoxy, but we pick them up locally, links below.
See our FAQ for information about epoxy safety.
Epoxy Resin
“Economy” Epoxies – For those on a budget we recommend US Composites “635 Thin” epoxy Link Here On this page you will see all their different formulations and cure times. This particular epoxy is suitable for any of the FRS models and you could use it for our cold molded designs too, but we don’t advise it (read below) There are several other brands that offer budget pricing but be sure you buy the right stuff (see items #1).
“Premium” Epoxy – West Systems 105 resin with matching hardener is the standard for epoxy in boat building. And for good reason, they literally invented the product and wrote the book on it! It can also be purchased from US Composites and you could also shop around online or locally and possibly find a better price. There is also MAS Epoxy, which has been around a while and is reputable. The recently popular, Total Boat Brand of epoxy is just MAS Epoxy with a different label. System Three is another brand that has been around for some time and makes a quality product as well. You can use these on any of our designs, however we strongly recommend a “Premium” epoxy if building a cold molded boat. The cost invested in those builds and the ability for these boats to be insured and sold within the custom sport fish and yacht market is why.
Other Equipment
Stir Sticks – we found that the local arts and crafts stores (like Michaels, AC Moore, Hobby Lobby, etc) have the best prices, especially considering the 40-50% off coupons they offer. Link Here
Mixing Cups – Using left over food containers that yogurt, butter, sour cream, cool whip etc come in work great. Or you can purchase waxed paper or plastic bowls from most any grocery store. Link Here
Gloves – We like the 5 mil thick nitrile gloves and get ours at Harbor Freight. Link Here
Chip Brushes – We pick these up from Harbor Freight also. Link Here
Foam Rollers – Once again, Harbor Freight is the source, but be warned they dissolve in resin so life span is short, but they work great when you need them! Link Here
Notched Spreader – This can be tricky to find, but they are often in the grout and tile section of the hardware store. The compact size and how easy to clean mean you will get many uses from them. Link Here
Plywood Suppliers
Unless you purchase a CNC cut kit you may find that plywood is often best sourced locally. But not every lumberyard carries marine grade plywood and how do you know which ones in your area do? Well, we don’t have a crystal ball to answer this one, but we are compiling a list of suppliers that we know of. We ask that you comment the supplier(s) that you know of and/or have used in your area. Our goal is for this resource to continue to grow and help as many as possible.
(We receive no compensation from any suppliers in this list.)
Our local supplier is :
Impulse Trading Company
2006 Johnson St, Newport, NC 28570
(561) 840-0500 worldpanel.com
Other Suppliers, listed by State:
Florida
World Panel Products
1750 Australian Ave #1, Riviera Beach, FL 33404
(404) 630-8861
Georgia
Southern Crown Boatworks
9550 US Hwy 80 West, Roberta, GA 31078
(404) 630-8861
Texas
Wood World of Texas
13650 T I Blvd Ste 101, Dallas, TX 75243
(972)669-9130 woodworldtx.com
Plywood Company of Fort Worth
4301 N. Sylvania Avenue, Fort Worth, TX 76137
(817) 831-4206 plywoodcompany.com
Minnesota
Midwest Boat Appeal & Marine Plywood
4340 Main Street St. Bonifacius, MN 55375
midwestboatappeal.com
North Carolina
Word Panel Products
146 County Farm Road, Windsor, NC 27983
(252)794-9944
Capitol City Lumber
4216 Beryl Rd, Raleigh, NC 27606
(919)832-6492 capitolcitylumber.com
The Hardwood Store
106 E Railroad Ave, Gibsonville, NC
(336)449-9627 hardwoodstore.com
Woodies Woodshop
6845 Market St, Suite A, Wilmington, NC 28405
(910)350-3550
How to Build a Boat – Mix Thickened Epoxy
This video explains how to mix epoxy with fillers and additives (such as fumed silica or Cabosil) to create thickened epoxy. Thickened epoxy is commonly used to bond wood to itself and other materials in boat building.